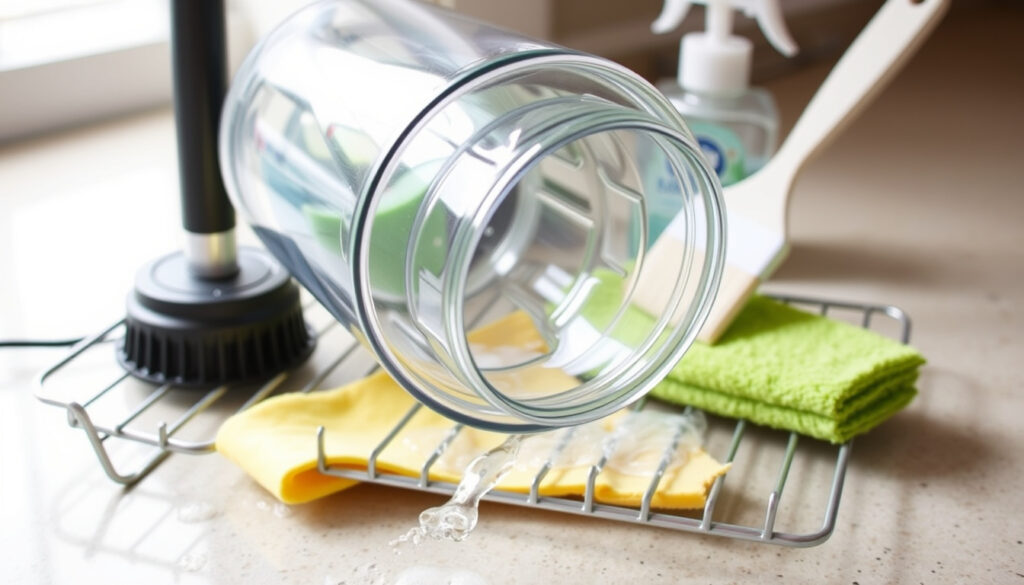
How to Clean a Blender Properly: Step-by-Step Guide
Anyone who has made a smoothie knows the scene: yesterday’s strawberry puree stuck to the blade assembly, just out of reach. A quick fill-and-blend with warm water and dish soap handles most of the mess, but the gasket and base need a different kind of attention — water temperature, soaking time, and the difference between cleaning and sanitizing decide whether your blender lasts two years or eight.
Recommended cleaning frequency: After every use to prevent residue buildup ·
Common household cleaning agents: White vinegar, baking soda, dish soap ·
Average blender lifespan: 5–8 years with proper maintenance ·
Mold removal effective solution: Bleach (diluted) or white vinegar ·
Blade assembly cleaning method: Hot water with dish soap or vinegar soak
Quick snapshot
- Cleaning after every use prevents residue buildup and bacterial growth (Wirecutter (NYT product reviews)).
- Vinegar and baking soda remove stuck-on food and lingering odors (Southern Living (kitchen editors)).
- The 5-to-8-year lifespan window shifts with usage frequency and model quality.
- Vinegar vs. bleach on gasket mold hasn’t been tested head-to-head in home kitchens.
- Blend soapy water for 20–30 seconds after each use (America’s Test Kitchen (test-kitchen lab)).
- Soak removable parts in 75 °C water for at least 2 minutes when sanitizing (WA Health (food-safety regulator)).
- Air-dry every part on a clean draining rack instead of a towel.
- Reassemble only when the gasket, blades, and lid ring are fully dry.
Ten figures, one pattern: precise ratios do the heavy lifting, while the motor base earns its keep by staying dry.
| Metric | Value | Source |
|---|---|---|
| Blender jar material | Glass or BPA-free plastic | Manufacturer specs |
| Recommended vinegar type | White distilled vinegar | Common kitchen guidance |
| Ideal bleach concentration | 1 tablespoon per quart of water | CDC mold cleanup guidance |
| Average cleaning time | 2–5 minutes daily; 15 minutes deep clean | Typical manufacturer routine |
| Dishwasher safety | Check manual – only some jars and lids are dishwasher-safe | Manufacturer instructions |
| Vinegar blend ratio | 3/4 cup white vinegar + 1/4 cup water; blend 30 seconds | Nutribullet (blender maker) |
| Cleaning water temperature | Below 115 °F with non-sudsing detergent | Katom (restaurant supplier) |
| Base cleaning limit | Damp cloth + mild detergent; never submerge | Breville (appliance maker) |
| Sanitizing soak | 75 °C water for at least 2 minutes | WA Health (food-safety regulator) |
What is the easiest way to clean a blender?
Quick daily cleaning method
- Fill the jar about halfway with warm water and a small amount of dish soap, blend briefly, then rinse thoroughly — that’s the daily method from Wirecutter (NYT product reviews).
- America’s Test Kitchen (test-kitchen lab) adds timing: use 2–3 drops of liquid dish soap and blend for 20–30 seconds, repeating with hot water if residue remains.
- Katom (restaurant supplier) keeps the water below 115 °F with a non-sudsing detergent, which avoids stubborn foam in the container.
Using hot water and dish soap
- Hot water loosens dried smoothie residue faster than cold water; pair it with the soap dose above and rinse with warm water rather than cold.
- Take the gasket and blade assembly out and hand-wash them after each use — a self-cleaning cycle doesn’t reach under the seal.
- If your model has a self-cleaning cycle, run it after the soapy blend, then still hand-wash the gasket.
The pattern: a 30-second blend is the single move that separates a clean blender from a stained one — it reaches the blade seal before food hardens there.
How to clean the bottom part of a blender?
Cleaning the blender base and motor housing
- Unplug the blender before touching the base, per Breville (appliance maker).
- Wipe the base with a damp cloth and a small amount of mild detergent; never immerse it in water or put it in the dishwasher (Simple Green (cleaning product maker)).
- TechRadar (tech and appliance outlet) gives the same verdict from the appliance side: clean the exterior with a damp cloth and keep water away from the motor housing to prevent damage.
- Around the control dials and vents, use a soft brush or toothpick — that’s where dried smoothie collects.
The motor base is the most expensive part on the counter, and a single dunk in the sink can kill it; the manufacturer-approved maintenance is a damp cloth and nothing more.
Preventing liquid from seeping into the base
- Remove the jar from the base before cleaning the carafe and small parts (Zwilling (cookware maker)).
- Clean the gasket seal, blades, and locking ring separately before reassembly (Simple Green (cleaning product maker)).
- Check the gasket for trapped food debris every few uses; a clean, dry seal is what keeps liquid out of the base.
- Wipe up spills on the base promptly — a wet motor housing is the usual reason blenders fail before their time.
The trade-off: the base asks for almost no cleaning, but the penalty for breaking that rule is a new blender, not a new jar.
How do I remove mold from my blender?
Bleach solution for mold
- Mold settles in moist gaskets and blade seals, where a quick blend never reaches.
- For heavy mold on non-porous parts, the standard household dilution is 1 tablespoon of bleach per quart of water; soak the gasket for 15 minutes, then rinse thoroughly (CDC mold cleanup guidance).
- Always rinse with clean water after a bleach treatment, and run a plain-water blend afterward to clear the spout.
Bleach disinfects, it doesn’t degrease: if food film is still on the gasket, the bleach solution can’t reach the mold underneath it, so scrub with soap first and use bleach only when mold is clearly visible.
Vinegar and baking soda alternatives
- White vinegar is the gentler everyday option; Nutribullet (blender maker) blends 3/4 cup of white vinegar with 1/4 cup of room-temperature water for about 30 seconds, then rinses thoroughly.
- For a jar that’s been ignored, Homes & Gardens (home care editors) suggests a 50/50 baking soda and water paste left on the interior for about an hour, without letting it dry out.
- KitchenAid Canada (manufacturer care guide) offers a cleaner alternative: a warm water and white vinegar solution, or a baking soda and warm water solution, run on high.
- If the gasket still smells or stays stained after cleaning, replace it — a new gasket costs a fraction of a new jar.
The pattern: soap removes the food, vinegar removes the odor, and bleach is the last resort for visible mold — in that order.
Can I clean my blender with vinegar?
Vinegar deep cleaning method
- Nutribullet (blender maker) specifies 3/4 cup white vinegar with 1/4 cup room-temperature water, blended for about 30 seconds, then thoroughly rinsed; a simpler home version is 1/2 cup vinegar with warm water to fill the jar — run it on high and let it sit for about 15 minutes.
- KitchenAid Canada (manufacturer care guide) runs a warm water and white vinegar solution on high, or a baking soda and warm water solution, for a deep clean.
- Southern Living (kitchen editors) reports that vinegar, baking soda, and water together handle stuck-on food and lingering odors.
What not to clean with vinegar
- Vinegar is safe for glass and BPA-free plastic jars, but keep it away from aluminum parts — the acid can etch the metal.
- Don’t let vinegar pool on natural stone countertops; the acid can dull the surface.
- Don’t treat vinegar as a sanitizer after raw-egg or meat smoothies; the hot-water soak is the food-safety step for those cases.
A weekly vinegar-and-blend routine keeps most gaskets mold-free, but a blender that regularly runs raw-egg smoothies needs the hotter sanitation step — vinegar’s acid is a cleaner, not a certified sanitizer.
The implication: choose your cleaner by what happened in the jar — a fruit smoothie is a vinegar job, a raw-egg smoothie is a hot-water job.
What is the lifespan of a blender?
Average lifespan and factors
- Most blenders are built for a 5-to-8-year working life with regular cleaning and sensible loading.
- Usage frequency and model quality shift that window in both directions — treat the range as a rough guide, not a warranty.
- Zwilling (cookware maker) treats the jar and blades as the parts that wear first, which is why it advises soaking the removed jar in lukewarm water rather than aggressive scrubbing.
Signs you need a new blender
- The common failure points are motor burnout, a cracked jar, and blades that no longer cut cleanly.
- Persistent odd smells, leaking from the base, or smoke from the motor housing mean the appliance has reached its end.
- If the base still runs smoothly but the jar is cracked, replacing the jar usually costs less than replacing the whole machine.
The implication: when a repair costs nearly half the price of a new blender — or the motor itself smells — cleaning is no longer the problem and replacement is the honest fix.
Comparison: Bleach vs. Vinegar vs. Baking Soda for a Dirty or Moldy Jar
Three methods, one pattern: strength and risk rise together, so the right choice depends on how much mold you found and how much rinse water you are willing to use.
| Method | How it works | Best for | Source |
|---|---|---|---|
| Diluted bleach (1 tbsp per quart of water) | Oxidizes mold on non-porous surfaces; needs a 15-minute soak and a thorough rinse | Visible mold in gaskets and seals after scrubbing | CDC mold cleanup guidance |
| White vinegar (3/4 cup + 1/4 cup water) | Acid dissolves residue and light mold on food-contact plastics; blend 30 seconds | Daily maintenance and mild discoloration | Nutribullet (blender maker) |
| Baking soda paste (50/50 with water) | Gentle abrasive lifts stuck-on food and neutralizes odors; leave about an hour | Caked-on residue on the jar interior | Homes & Gardens (home care editors) |
The catch: none of these replaces scrubbing the food film away first — sanitizers and acids stop working when a layer of dried smoothie sits between them and the surface.
Step-by-Step: How to Clean a Blender Properly
A full clean takes about 10 minutes plus drying time; this order is what keeps the mold problem from coming back.
- Unplug and disassemble. Remove the jar, lid, and gasket from the base so nothing drips into the motor housing (Breville (appliance maker)).
- Soak the jar. Place the removable jar in lukewarm water to loosen dried residue while you work (Zwilling (cookware maker)).
- Blend-clean the jar. Add warm water and 2–3 drops of dish soap, blend for 20–30 seconds, then rinse (America’s Test Kitchen (test-kitchen lab)).
- Deep-clean with baking soda or vinegar. Use the 50/50 baking soda paste for a long-neglected jar, or the vinegar solution for a weekly clean (Homes & Gardens (home care editors)).
- Scrub the small parts. The gasket, blades, lid, and locking ring need a sponge or scrub brush to remove build-up; the dishwasher can’t reach those seals (Simple Green (cleaning product maker)).
- Wipe the base. Use a damp cloth with mild detergent, then a dry pass, and keep every drop away from the vents.
- Sanitize when it matters. If you’ve blended raw eggs, meat, or anything that sat out, soak the removable parts in 75 °C water for at least 2 minutes (WA Health (food-safety regulator)).
- Air-dry on a rack. Set every part on a clean draining rack until fully dry, then reassemble.
The pattern: most of the routine is mechanical — disassemble, blend-clean, scrub, dry — and the only step people skip, the gasket, is the one that turns a clean blender into a mold farm.
What’s Confirmed vs. What’s Still Unclear
Confirmed facts
- Blenders should be cleaned after every use to prevent residue buildup and bacterial growth (Wirecutter (NYT product reviews)).
- Vinegar and baking soda remove stuck-on food and lingering odors (Southern Living (kitchen editors)).
- The motor base must never be submerged or placed in a dishwasher (TechRadar (tech and appliance outlet)).
What’s unclear
- The exact blender lifespan depends heavily on usage frequency and model quality — the 5-to-8-year figure is a rough window.
- Whether vinegar or bleach is more effective on gasket mold hasn’t been studied head-to-head in real kitchen conditions.
- “Self-cleaning” cycles don’t replace manual gasket cleaning; most manufacturers still advise removing the gasket separately.
- A “dishwasher-safe” label on the jar doesn’t guarantee the blade assembly survives repeated cycles — the manual is the final word.
The pattern: the confirmed facts are backed by reputable sources, while the unclear points show where personal experience still guides best practice.
What the Experts Say
Deep cleaning works best with either a warm water and white vinegar solution or a baking soda and warm water solution run in the blender on high (KitchenAid Canada (manufacturer care guide)).
KitchenAid Canada
The easiest daily clean is to fill the jar partly with warm water and a small amount of dish soap, blend briefly, and rinse thoroughly (Wirecutter (NYT product reviews)).
Wirecutter
For heavy soil, use water below 115 °F in the blender container with a non-sudsing detergent, rather than hot water and heavy suds (Katom (restaurant supplier)).
Katom
The Takeaway
Skip the quick clean and the gasket becomes the first part to fail — it holds moisture, food particles, and eventually mold in the exact spot your next smoothie touches. For home cooks who use a blender even a few times a week, the choice is clear: build a 30-second rinse-and-blend habit, deep-clean with vinegar or baking soda on a schedule, and keep the base dry — or budget for a replacement jar, and eventually a new motor, sooner than the 5-to-8-year window most blenders are built for.
Frequently asked questions
How often should I deep clean my blender?
Do the quick soap-and-water blend after every use, and schedule a deeper vinegar or baking soda clean for the jar and gasket at least weekly — or any time the jar feels slick or smells after rinsing. Blenders used for raw eggs or meat should also get the hot-water sanitizing soak right after use.
Can I put blender parts in the dishwasher?
Only the parts the manual says are dishwasher-safe — usually the jar and lid, often on the top rack. The base always stays out, and the blade assembly and gasket are better hand-washed because the dishwasher jets rarely clean under the seals. Keep water away from the motor housing entirely (TechRadar (tech and appliance outlet)).
How do I get rid of blender smell?
Blend baking soda with warm water for a few minutes to neutralize persistent smells — a method Southern Living (kitchen editors) recommends — then run a vinegar and water solution through the jar and rinse.
Is it safe to use bleach in a blender?
Occasionally, for glass and plastic jars, when heavily diluted — 1 tablespoon of bleach per quart of water — and only if you rinse thoroughly and run a clean-water blend afterward. Never use bleach on the base or on aluminum parts (CDC mold cleanup guidance).
What happens if I don’t clean my blender after use?
Residue hardens around the blade seal, odors get trapped in the gasket, and mold can take hold in the moist parts. A blender left dirty for days needs a soak and a scrub, not just a quick blend.
Can I use lemon to clean my blender?
Yes — a lemon slice blended in warm water can freshen the jar. For stuck-on food and odors, though, white vinegar and baking soda are the better-documented options.
How do I clean the blender lid and sealing ring?
Wash the lid, gasket, and locking ring separately with warm soapy water, scrub the ring with a brush, and dry them fully before reassembly. If mold is visible, soak the ring in the diluted bleach or vinegar solution before scrubbing.
Related reading: How to Make Lemonade: Perfect Homemade Recipe & Ratios · Stir Fry Sauce Recipe: Basic, 3-Ingredient, and More
More related posts
 Christmas Gifts for Men in Ireland: Top Picks & Rules
 Bank of Ireland Share Chat – Forums, Updates & Stock Analysis
 Storage Boxes with Lids Ireland: Where to Buy & Best Sizes
 HSE Civil Registration Service – Births Deaths Marriages Guide
 Icon of the Seas Royal Caribbean: Price, Decks & Review
 Chelsea v Man United: Head-to-Head, History & Fan Comparison
 Ramen Shoyu Near Me: Find It, Eat It, and Know the Health Facts
 Radisson Blu Hotel Athlone: 4-Star Riverside Guide
